If you’re considering leaving relaxers behind, you need to know there’s a transition from relaxed hair to natural hair period. Especially if you don’t want to cut off all your processed hair.
And despite what some people say, life does not suddenly become easier just because you decided to go natural. In fact, there are many things you need to take into consideration. It’s a big step for sure, and definitely hard work. But we can tell you right now that few people regret going natural afterwards.
While the following styles are protective, you can still wear your hair out occasionally. Try these hairstyles to get you through the transition from relaxed hair to natural hair. They will even make you feel confident that your hair looks good every day.

Transition From Relaxed Hair To Natural Hair With VIP Flexi Rods
As the name suggests, these foam curlers bend easily around your hair and around themselves to secure their position. Because they are available in different sizes, you can control your finished look with VIP flexi rods. They also deliver gorgeous, heatless curls. Thus, this is a healthy way to transition from relaxed hair to natural hair.
- Start with freshly washed, detangled hair. Part hair into one-inch pieces. Apply the Lottabody Wraps Me Foaming Mousse to each section. Wrap hair around the rod. Fold the ends of the flexi rod inward to gently hold the hair in place as it curls. Repeat this process until your hair is full of curling rods.
- Next, apply Lottabody Wraps Me Foaming Mousse to each section. Wrap hair around the rod.
- Fold the ends of the flexi rod inward to gently hold the hair in place as it curls. Repeat this process until your hair is full of curling rods.
- Keep in place for several hours, then take down the flexi-rods and separate the curls using your fingers.

Bantu Knots
Bantu Knots are beautiful. For many Black women, they represent an extra layer of pride. The Zulu people of Southern Africa originated Bantu Knots. Sections of the hair is twisted, and wrapped. When done properly, the hair stacks upon itself to form a spiraled knot.
Here’s how to create this hairstyle to transition from relaxed hair to natural hair:
- As with wet sets, start with dry, cleansed hair. Section your hair into the desired size for each knot.
- To begin the knots, take down the first section and apply a hydrating product. VIP has a large selection of hydrating products specifically for natural hair. Come in and check out our natural beauty hair products.
- Next, create a two-strand twist, or braid from that section.
- Then, take the twisted strand and begin to coil it horizontally toward the scalp. This forms a tight, secure knot.
- Secure the knot by folding the end underneath or using a small bobby pin.
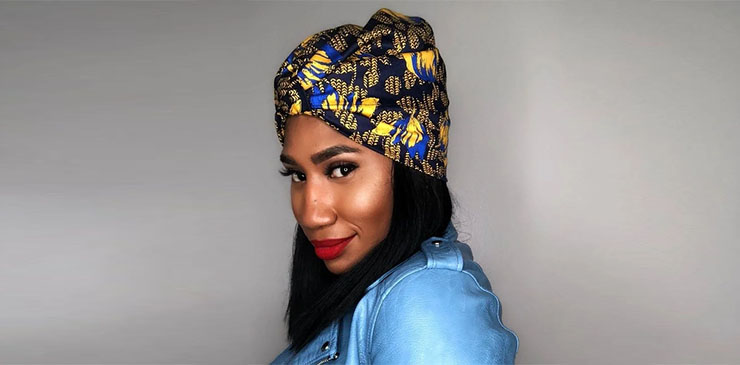
Head Wraps
Head wraps are both stylish and protective. However, you’ll want to invest in one with a silk or satin lining. Doing so will prevent your coils from drying out or snapping due to friction. Scarves and wraps work with any number of hairstyles. We call June ‘restocked month’ because we’ve re-uped on head scarves and head wraps. Now, our VIP beauties have a variety to choose from!
VIP has all the products to help you create the styles above and more! Of course, our stylists can also create all of these styles and whatever else you have in mind.
You may also enjoy reading: VIP Beauty Inspiration: 6 Chic Senegalese Twists Our Braiders Approve Of